This tutorial is part of our collection of Craft and DIY Projects. Sign up for our newsletter to receive family-friendly activity, recipe and craft ideas throughout the year!
My son starts getting excited for Chinese New Year when he sees round red lanterns on display in Chinatown shop windows. He comes home talking about red envelopes, delicious food and lion dancers, then sits down at his arts and crafts table ready to put his creativity to work.
This week’s Festival Lantern project comes courtesy of Jennifer DeCristoforo, author and illustrator of the Lucky Bamboo Book of Crafts. Making a lantern is the perfect project to engage a child when inspiration strikes, while providing parents an opportunity to share Chinese New Year themes and traditions.
Jennifer, who adopted her daughter Cloe Mei from China in 2003, wrote her book in part to help her daughter maintain a connection with Chinese culture as she grew up here in the United States. She explains, “I think crafting and art projects are some of the best ways to engage kids in something they have fun doing, while giving them some context and cultural perspective.”
My family enjoys crafts for the creative options and storytelling opportunities they provide. A single cultural seed, for instance that red lanterns at Chinese New Year symbolize luck and family togetherness, can blossom into a creation that is faithful to tradition, culturally-inspired or something entirely new.
“The lantern is such an iconic part of the culture,” Jennifer continues. “Making a project like this with family and friends brings people together and adds to the important celebration decorating process. The artistic flare that is put into the lantern can be Chinese, American or a combination.”
To make our lantern, I started with the classic red and gold colors from the lanterns my son sees around town. From there, we created a fun contemporary design that, most importantly, got my son excited about hanging the rest of our Chinese New Year decorations around the house. That’s the real point.
As you dive into this festival lantern project, bear in mind that the amount of cutting and careful alignment required probably makes this craft most suitable for older children. It’ll take 90 minutes from start to finish, but most of that time is spent allowing the lantern to dry once it’s decorated.
Craft projects are an opportunity to share family stories. For example, Jennifer shares how she celebrates Chinese New Year, “With my family, I decorate my home with lanterns, couplets, fruit and lots of red. I endeavor to do a good cleaning, keeping with tradition, before the decorations go up. Then I’ll usually make dinner for a few friends. I also celebrate by offering hands-on crafts from my book around New England and, most exciting for me and my daughter, in Boston Chinatown. It’s a very busy time of year!”
Here’s how to make a Chinese festival lantern, step-by-step. The detailed tutorial with pictures and directions is at the bottom of the page.
Your turn! Can you share any tips from your experience making this lantern? Want to ask a question before making them yourself? I’d love to hear from you in the comments section below!
Chinese Festival Lantern
Makes: 1 Lantern | Prep Time: 5 Minutes | Project Time: 90 Minutes
Materials
22″ x 28″ white poster board
11″ x 17″ yellow construction paper
Red and yellow tissue paper
Kitchen twine
Stick for a handle (optional)
Glue
Paint brush
Scissors
Stapler
Pencil
Tape
Ruler
Step-By-Step Tutorial
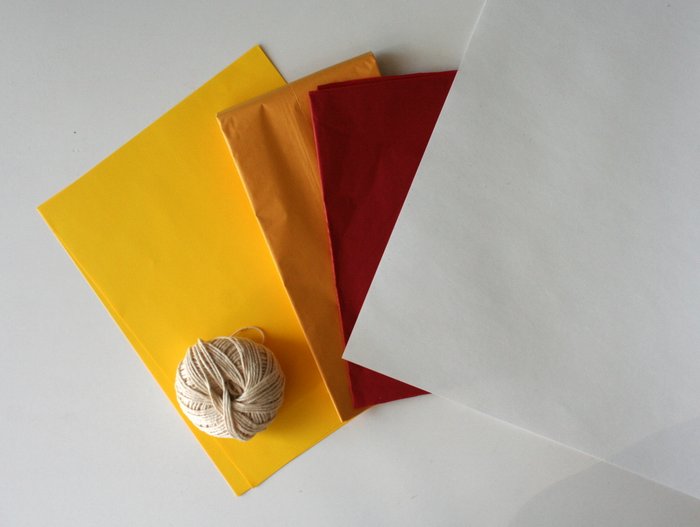
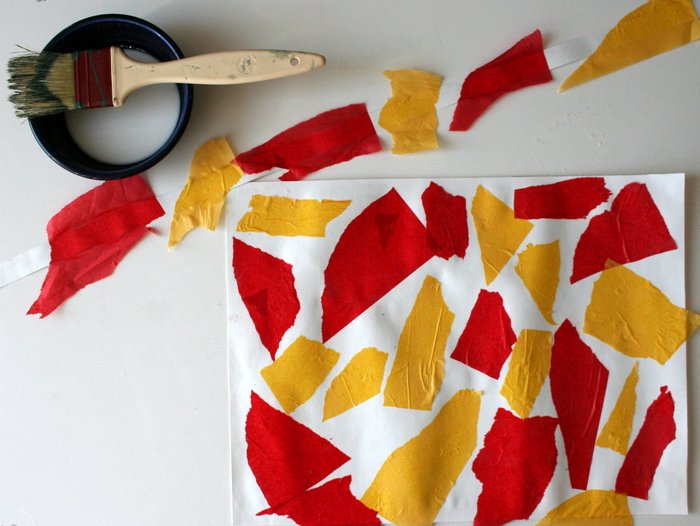
The project materials are available at any craft store. You need a large sheet of poster board, a single color of construction paper, a ball of twine and tissue paper to decorate. In this case, I chose lucky red and gold.
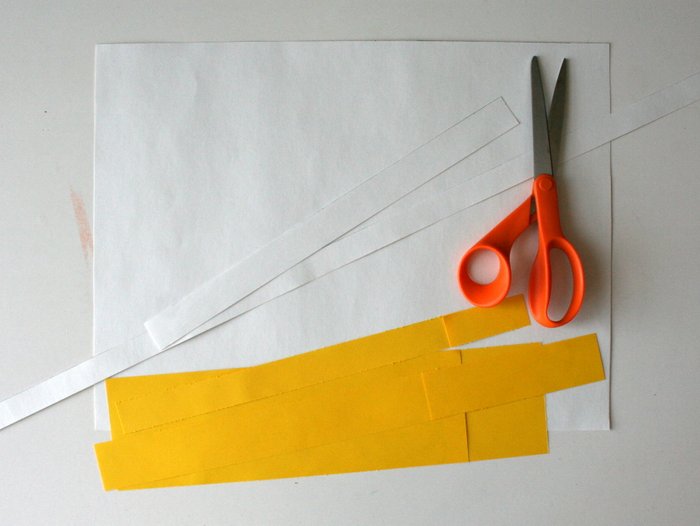
Begin by cutting three pieces of poster board: 16″ x 12″, 28″ x 3/4″ and 13″ x 1″. Next, cut three pieces of construction paper: 13″ x 1″, 16″ by 1 1/2″ and 13 1/2″ x 3 1/2″. (If you’re working with smaller sheets of construction paper, it’s OK to tape them together to achieve the sizes indicated.)

Now the fun part. Mix together a solution of 1 part glue to 1 part water. Lightly brush the mixture over the 16″ and the 28″ pieces of poster board, apply pieces of ripped tissue paper to decorate, then brush with a light top coat of glue solution.
Set aside and let dry completely. It’ll take between 45 minutes and an hour.
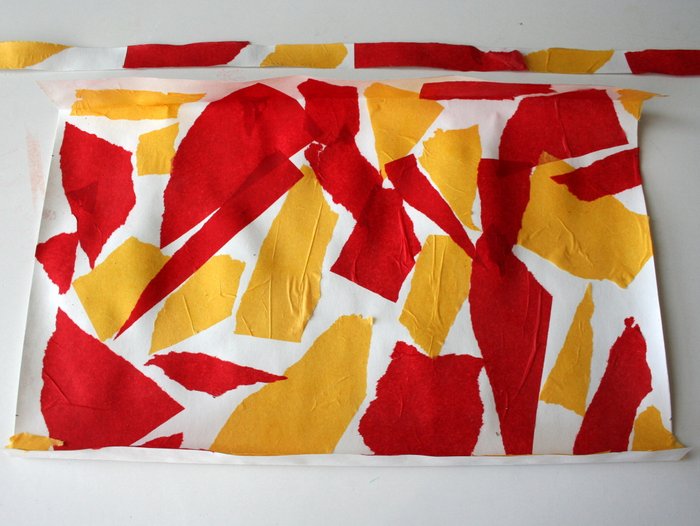
Trim any excess tissue paper that extends past the edge of the poster board. Draw lines lengthwise on the 16″ piece of poster board across the top 1 1/2″ and the bottom 1″. Fold creases on both lines and then flatten back out.

Flip the 16″ piece of poster board over and lightly draw lines 1″ apart from the bottom of the sheet up to the 1 1/2″ creased line you just created.
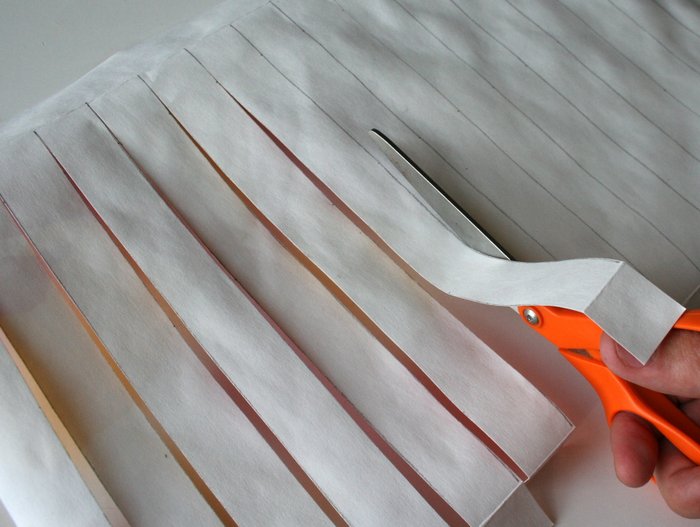
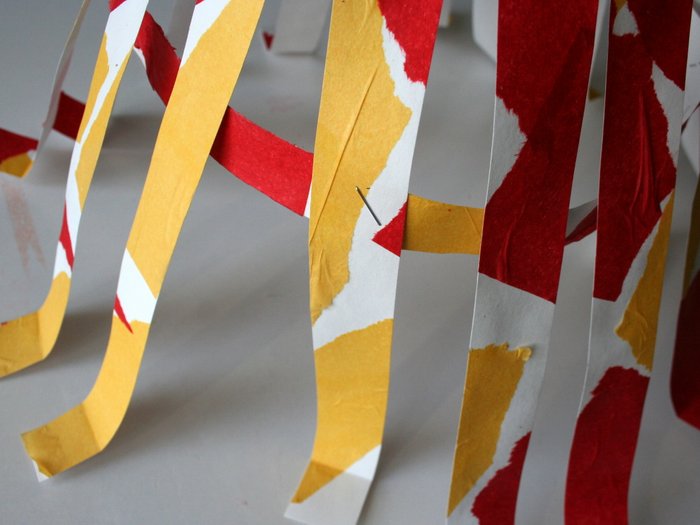
Cut each line up to this 1 1/2″ crease line. Don’t go any further!
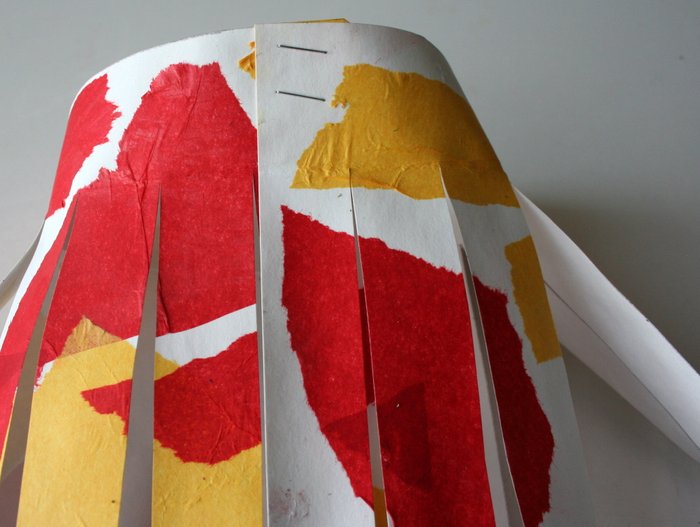
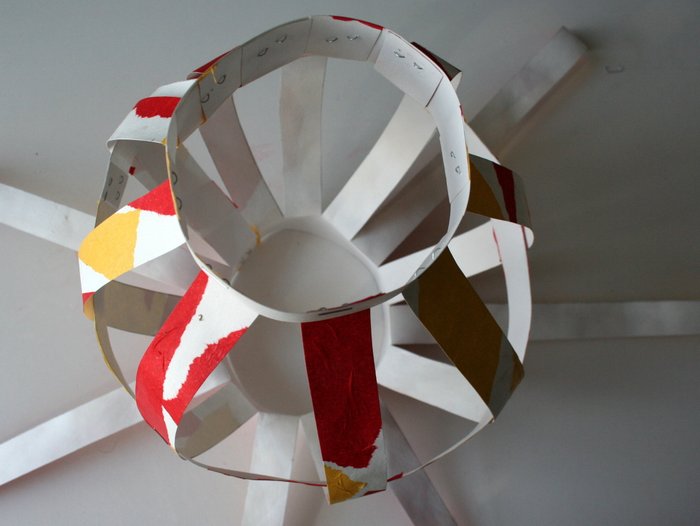
Pick up the 16″ piece of poster board and connect the top border in a ring by overlapping the ends slightly and stapling shut. This is the top ring of the lantern.
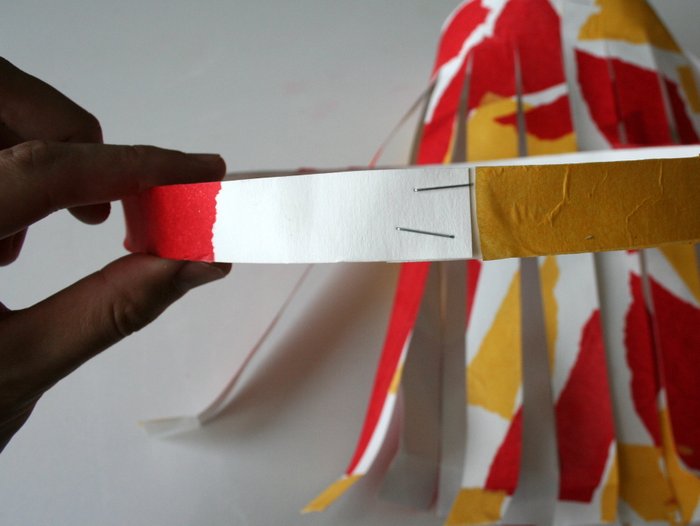
Next, loop the 28″ piece of poster board into a ring with the tissue paper decorations facing outward and staple it together. This is the lantern’s central ring.
Now the tricky part — attaching the central ring to give the lantern a nice round globe shape. What you want to do is place the central ring right at the lantern’s equator, with the slats equally spaced around the circle.
Gently work the central ring down the inside of the lantern until it sits halfway between the lantern’s top and bottom creased lines — the perfect spot is about 4 1/2″ from either end.
Imagine a square sitting inside the lantern. Assign one corner by stapling one slat to the central ring, then reach across the lantern and staple the slat representing the square’s opposite corner. Repeat with the final two corners of the square inside the lantern and everything will be perfectly spaced.

Staple the 13″ piece of poster board into a ring.
Gather the lantern’s bottom strips and staple them into the ring, repeating the exercise above for the central ring to space the slats evenly.
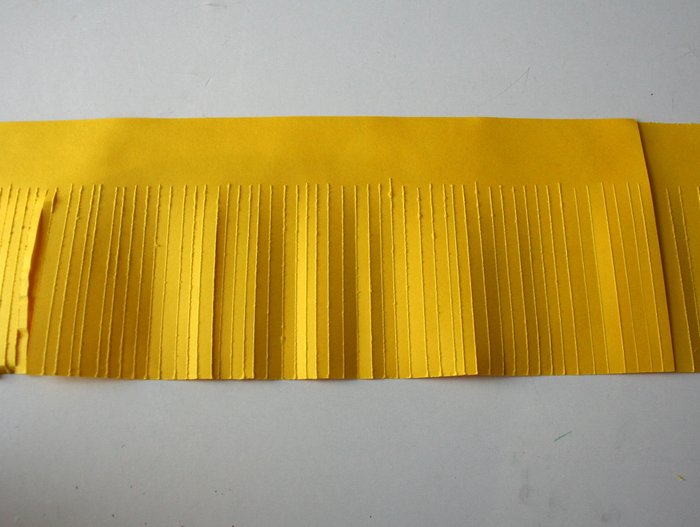
Take the 13 1/2″ pice of construction paper and cut a thin fringe on the long side of the paper, leaving 1″ at the top.
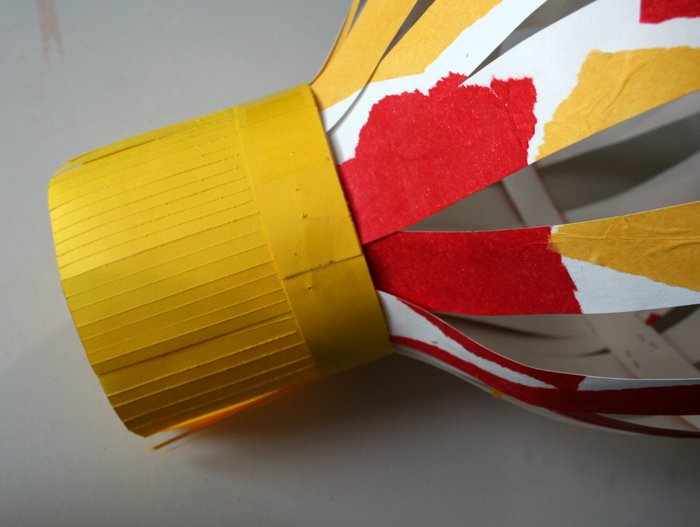
Align the 13″ strip of construction paper over the 1″ section left at the top of the fringe, then secure to the bottom ring of the lantern with tape.
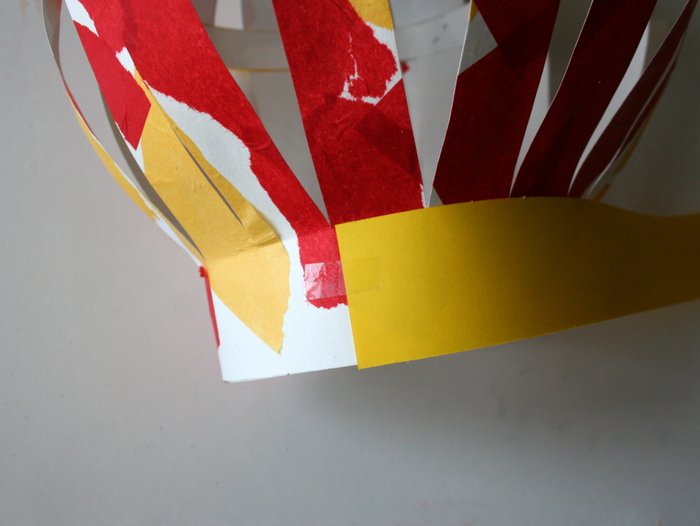
Secure the 16″ strip of construction paper to the top ring of the lantern with tape.

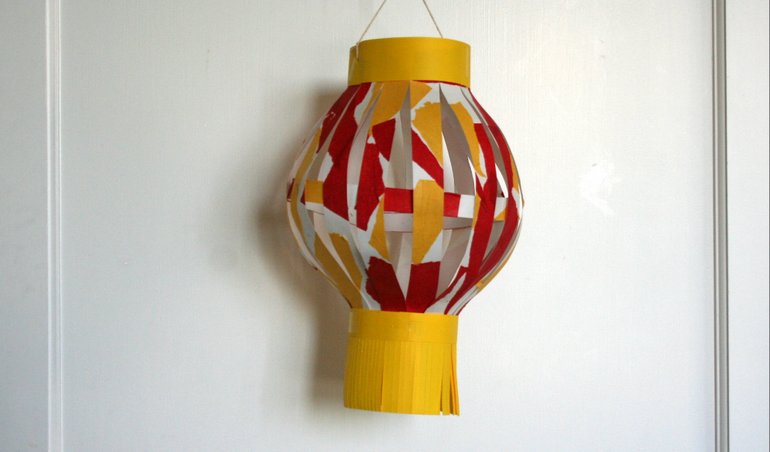
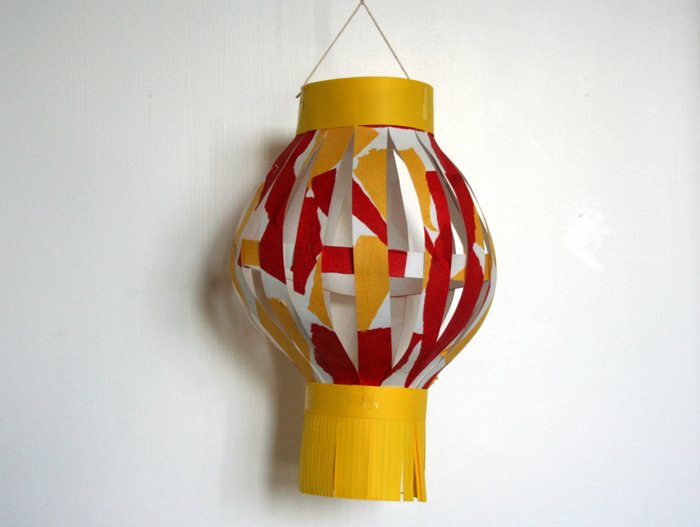
Thread kitchen twine through two holes in the top ring of the lantern to create a hanging loop.
Display your finished lantern!


atachiera
Great Interview and fun project! Really enjoyed this!
Wes Radez
I’m glad to hear that! Thanks for stopping in! ~Wes